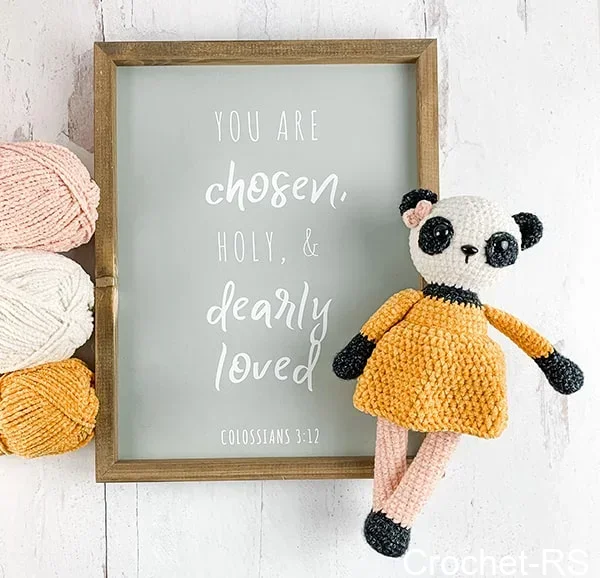
Small Animal Collection: Panda
Jen Hayes Creations Small Panda Pattern
This fantastic free crochet pattern by Jen Hayes Creations will walk you through creating an adorable, pocket-sized panda! The pattern features a classic two-tone aesthetic with perfectly rounded proportions, making it an ideal desk buddy or a sweet little gift. The simple shapes used in this design mean it works up relatively quickly while still delivering huge on charm.
As always, you can customize your panda by using different yarn weights. A chunky blanket yarn will give you a massive, squishy friend, while a standard worsted weight creates a classic plushie. Grab your hooks and let’s get crafting!
Materials
- Crochet Hook, Size E/4 (3.5 mm)
- Stitch Marker(s)
- Scissors
- Stuffing
- Tapestry Needle
- Pins
- Safety eyes, 10 mm
- Disc Needle Puller (optional)
- Chopstick, dowel, or something similar to help with stuffing small parts
- Red Heart Super Saver (worsted 4-Medium, 100% acrylic, 364 yds/333 m, 7 oz/198 g): Color (A) White, used approx. 40 yds/ 36.5 m, Color (B) Black, used approx. 47 yds/ 43 m
Gauge
Using hook size E/4 (3.5 mm) the first 6 rounds of the body measures 2-1/8 inches in diameter.
Finished Measurements
Using hook size E/4 (3.5 mm) the Panda measures approximately 6 inches tall from the base to the top of the ear in the sitting position.
Design Notes
- The pattern is written using US crochet terminology.
- The majority of the pattern is written in rounds, it will be helpful to place a stitch marker at the beginning stitch of the round and move it up at the start of each additional round.
- At the end of each round the number of stitches for completion is noted in parentheses.
- Further design notes will be provided throughout the pattern to help aid in construction.
- Caution! If using safety eyes take into consideration who will be using the item. The use of safety eyes is not recommended for children under the age of three or for those prone to putting things in their mouth as they may cause a choking hazard. Crocheted or hand embroidered eyes are a great alternative!
Abbreviations/Stitches Used
- back bar – work stitches into the horizontal bar on the underside of a foundation chain
- ch – chain
- Rnd(s) – Round(s)
- Row(s) – Row(s)
- sc – single crochet
- sc2tog – single crochet 2 stitches together (invisible decrease)
- sl st – slip stitch
- st(s) – stitch(s)
- [ ] – Work instructions between brackets as many times as directed
- magic circle/adjustable ring
Let’s Make Our Panda!
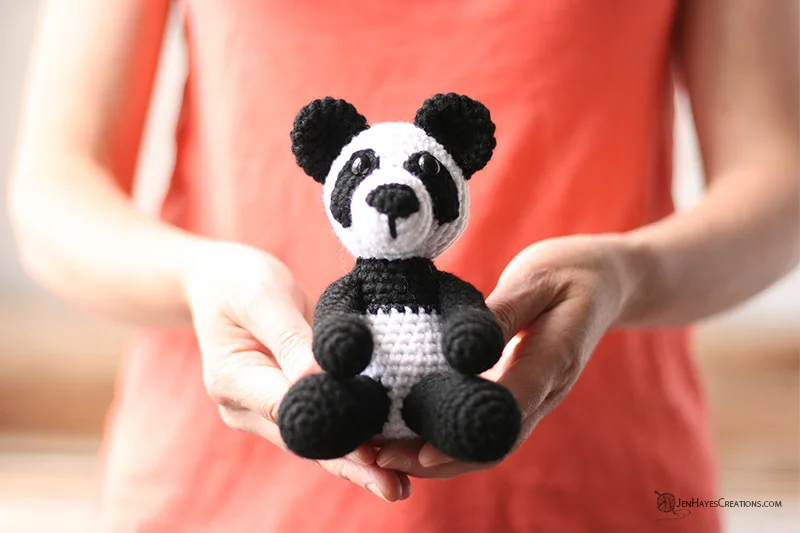
Eye Patch
Make 2
Using Color (B)
- Ch 6
- Rnd 1: Working in the back bar: sc in the 2nd ch from the hook, sc in the next 3sts, 3sc in the next st, working in the front of the chain: sc in the next 3sts, 2sc in the last st. (12sts)
- Sl st to the first st and fasten off leaving a long tail for fastening the eye patch to the head. Weave in the starting tail.
Head
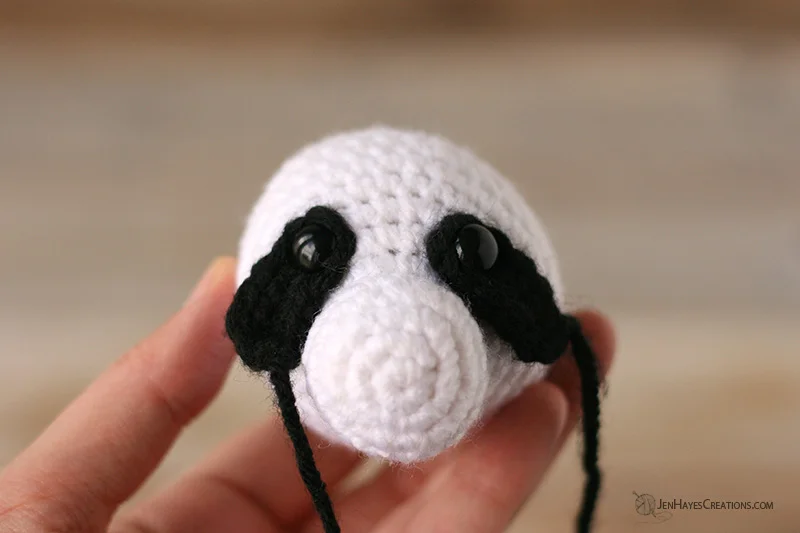
The head is worked from the nose up to the back of the head.
Using Color (A)
- Rnd 1: 6sc in adjustable (magic) circle. (6sts)
- Rnd 2: 2sc in each st around. (12sts)
- Rnd 3: [Sc in the next st, 2sc in next st] 6 times. (18sts)
- Rnds 4-5: Sc in each st around. (18sts for 2 Rnds)
- Rnd 6: [Sc in the next st, sc2tog] 6 times. (12sts)
- Rnd 7: 2sc in each of the next 6sts, sc in the last 6sts. (18sts)
>Design Note: The increases in the first 6 stitches will begin to form the upper part of the forehead. Keep this in mind when stuffing and shaping the head.
- Rnd 8: [Sc in the next 2sts, 2sc in the next st] 6 times. (24sts)
- Rnd 9: [Sc in the next 3sts, 2sc in the next st] 6 times. (30sts)
- Rnd 10: Sc in each st around. (30sts)
- Rnd 11: [Sc in the next 4sts, 2sc in the next st] 6 times. (36sts)
- Rnds 12-13: Sc in each st around. (36sts for 2 Rnds)
- Rnd 14: [Sc in the next 4sts, sc2tog] 6 times. (30sts)
- Rnd 15: Sc in each st around. (30sts)
- Rnd 16: [Sc in the next 3sts, sc2tog] 6 times. (24sts)
It’s time to add the eyes and eye patches. Place the safety eye on one end so just the edge V stitches are showing on the edge and then insert the safety eye into the head between Rnd 7 and 8 of the forehead portion with about 3sts showing in between the eye patches, and the eye patch able to lie against the edge of the snout. Secure the back of the safety eye.
Begin to firmly stuff and shape the head and continue to do so as the pattern progresses.
- Rnd 17: [Sc in the next 2sts, sc2tog] 6 times. (18sts)
- Rnd 18: [Sc in the next st, sc2tog] 6 times. (12sts)
- Rnd 19: [Sc in the next st, sc2tog] 4 times. (8sts)
- Sl st to the 1st st and fasten off leaving a long tail to close up the hole. Close the hole with a tapestry needle stitching only through the front loops until the hole pulls nicely closed, secure and weave in the end.
Body
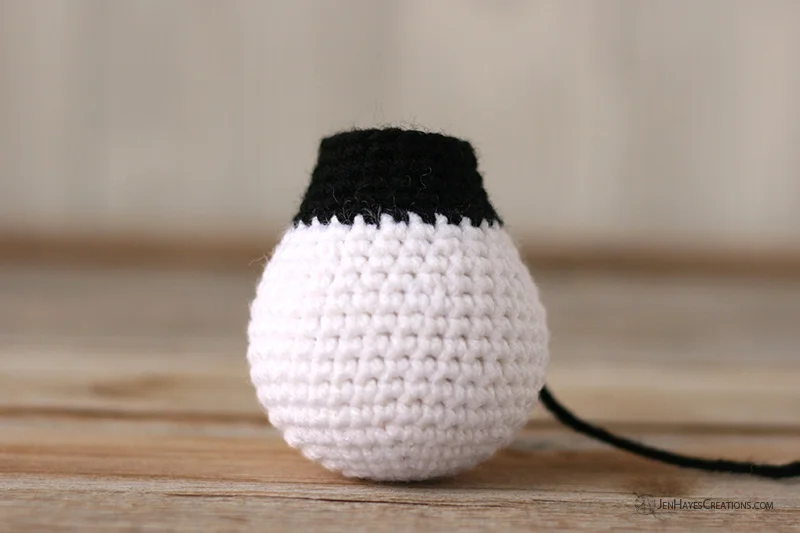
The body is worked from the base up towards the neck.
Using Color (A)
- Rnd 1: 6sc in adjustable (magic) circle. (6sts)
- Rnd 2: 2sc in each st around. (12sts)
- Rnd 3: [Sc in the next st, 2sc in next st] 6 times. (18sts)
- Rnd 4: [Sc in the next 2sts, 2sc in the next st] 6 times. (24sts)
- Rnd 5: [Sc in the next 3sts, 2sc in the next st] 6 times. (30sts)
- Rnd 6: [Sc in the next 4sts, 2sc in the next st] 6 times. (36sts)
- Rnds 7-12: Sc in each st around. (36sts for 6 Rnds)
- Rnd 13: [Sc in the next 4sts, sc2tog] 6 times. (30sts)
- Rnd 14: Sc in each st around. (30sts)
- Rnd 15: [Sc in the next 3sts, sc2tog] 6 times. (24sts)
- Rnd 16: Sc in each st around. (24sts)
Firmly stuff and shape the body and continue to do so as the pattern progresses.
Switch to Color (B)
- Rnd 17: Sc in each st around. (24sts)
- Rnd 18: [Sc in the next 2sts, sc2tog] 6 times. (18sts)
- Rnds 19-21: Sc in each st around. (18sts for 3 Rnds)
- Sl st to the first st and fasten off leaving a long tail to attach the body to the head.
Ears
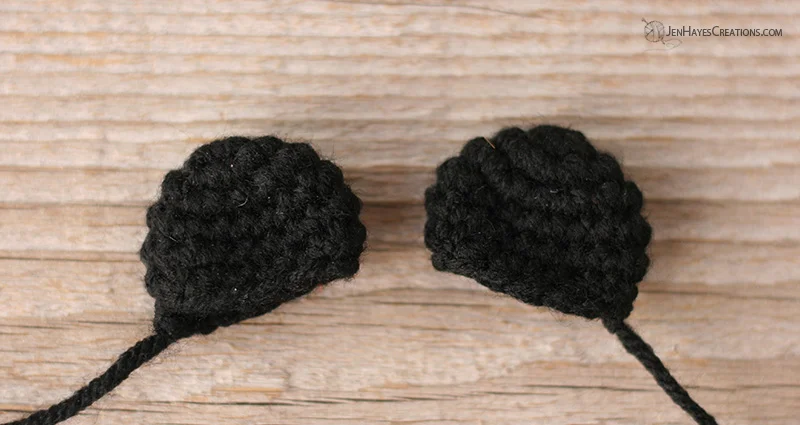
Make 2
Using Color (B)
- Rnd 1: 6sc in adjustable (magic) circle. (6sts)
- Rnd 2: 2sc in each st around. (12sts)
- Rnd 3: [Sc in the next st, 2sc in next st] 6 times. (18sts)
- Rnds 4-5: Sc in each st around. (18sts for 2 Rnds)
- Rnd 6: [Sc in the next st, sc2tog] 6 times. (12sts)
- Sl st to the first st and fasten off leaving a long tail for attaching the ears to the head.
Arms
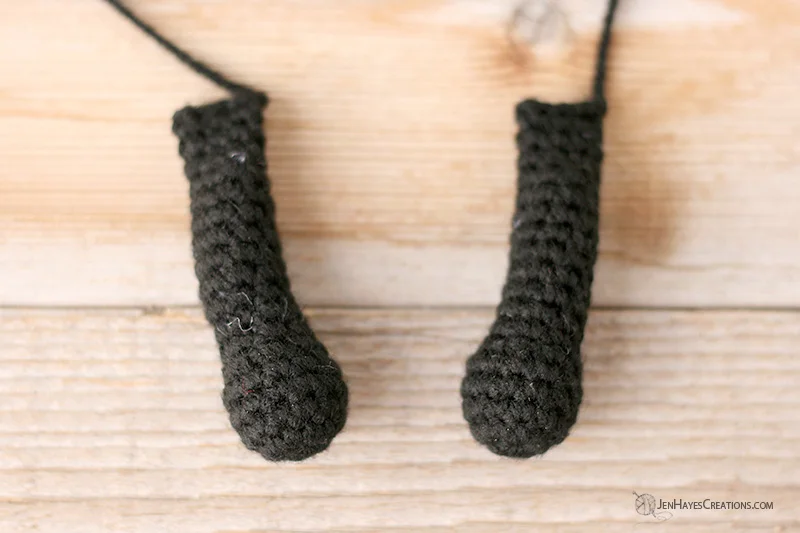
Make 2
Using Color (B)
- Rnd 1: 6sc in adjustable (magic) circle. (6sts)
- Rnd 2: 2sc in each st around. (12sts)
- Rnds 3-5: Sc in each st around. (12sts for 3 Rnds)
- Rnd 6: [Sc in the next st, sc2tog] 4 times. (8sts)
Firmly stuff and shape the arm and continue to do so as the pattern progresses. Do not stuff the top few rows so the arm can lie flatter against the body when attached.
- Rnds 7-18: Sc in each st around. (8sts for 12 Rnds)
- Rnd 19: Flatten the top edges together, lining up the stitches, sl st together. (4sts)
- Fasten off leaving a long tail for attaching the arm to the body.
Legs
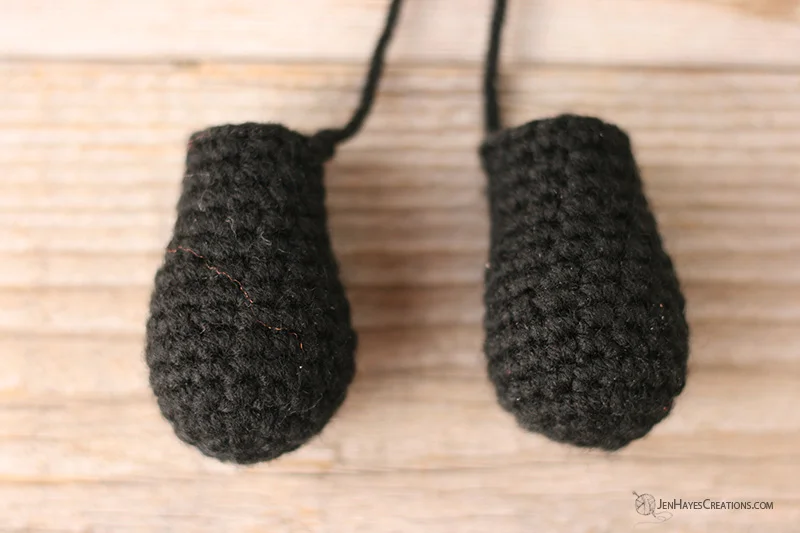
Make 2
Using Color (B)
- Rnd 1: 6sc in adjustable (magic) circle. (6sts)
- Rnd 2: 2sc in each st around. (12sts)
- Rnd 3: [Sc in the next st, 2sc in next st] 6 times. (18sts)
- Rnds 4-6: Sc in each st around. (18sts for 3 Rnds)
- Rnd 7: [Sc in the next 4sts, sc2tog] 3 times. (15sts)
- Rnds 8-9: Sc in each st around. (15sts for 2 Rnds)
- Rnd 10: [Sc in the next 5sts, sc2tog] 2 times, sc in the last st. (13sts)
Firmly stuff and shape the leg and continue to do so as the pattern progresses.
- Rnds 11-14: Sc in each st around. (13sts for 4 Rnds)
- Sl st to the first st and fasten off leaving a long tail for sewing the leg to the body.
Tail
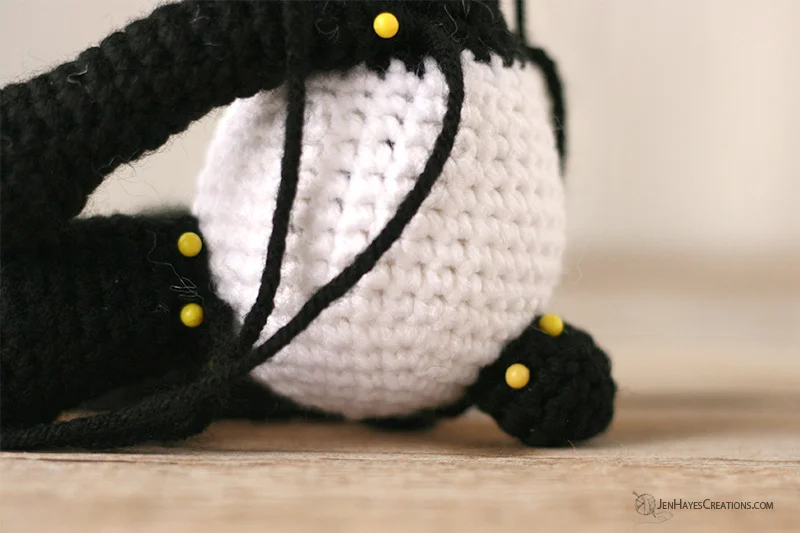
Using Color (B)
- Rnd 1: 4sc in adjustable (magic) circle. (4sts)
- Rnd 2: 2sc in each st around. (8sts)
- Rnd 3: [Sc in the next st, 2sc in next st] 4 times. (12sts)
- Rnd 4: Sc in each st around. (12sts)
- Rnd 5: [Sc in the next st, sc2tog] 4 times. (8sts)
- Sl st to the first st and fasten off leaving a long tail for sewing the tail to the body. Stuff the tail.
Tip of the Nose
Using Color (B)
>Design Note: The tip of the nose is NOT worked in rounds.
- Row 1: 3sc in adjustable (magic) circle (3sts)
- Row 2: Ch1, turn, 2sc in the 1st st, sc in the next st, 2sc in the last st. (5sts)
- Fasten off leaving a long tail for sewing the tip to the end of the snout. Weave in the starting tail.
Assembly
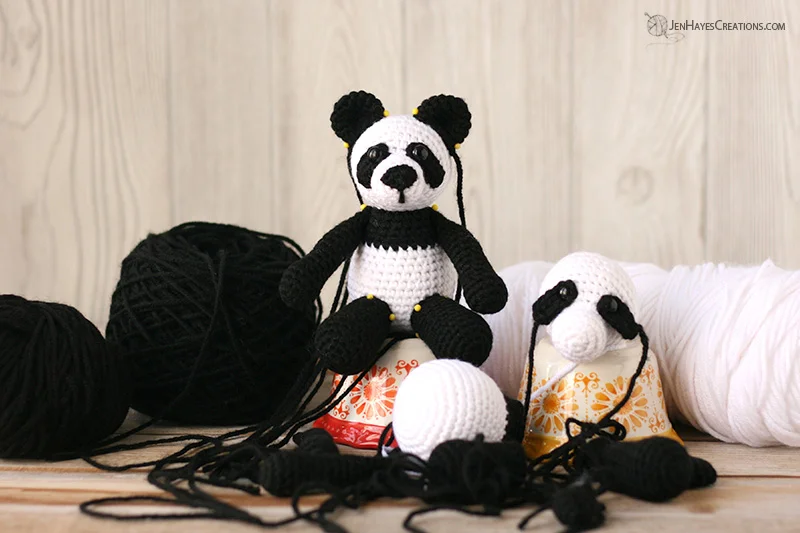
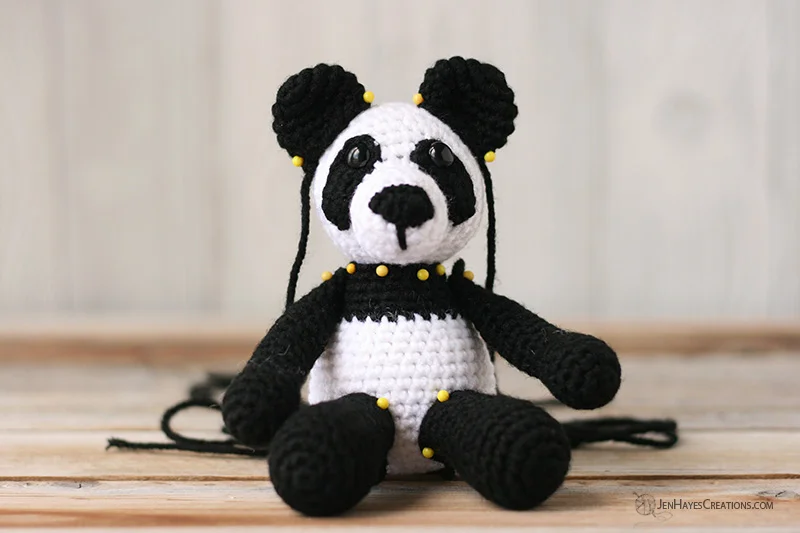
Pin all the pieces together to determine the desired placement for the entire piece and then stitch them securely into place. Remember to add any additional stuffing needed before closing up the holes on the pieces requiring stuffing.
General placement and stitching suggestions:
- Stitch the eye patches diagonally next to the nose.
- Stitch the tip of the nose at the end of the snout. The magic circle portion is at the bottom, placed at about Rnd 1 of the head. Once attached stitch the line coming down from the bottom tip of the nose to between about Rnd 3 and 4 of the head.
- Place the bottom head centered over the body.
- Place the ears on the head over about Rnds 12-14 with about 3sts between them.
- Place the legs in the front of the body, in a sitting position, over about Rnds 6-11.
- Place the arms on either side of the body about one round down from the head and neck join, either slanted forward or down to the sides.
- >Design Note: The top few rounds of the arm were left unstuffed to help them lie flatter against the body. Another option is to tack them down to the body with a few stitches in the desired position.
- Place the tail on the back of the body, centered over about Rnds 5-8.
- Once the desired placement is achieved stitch all the pieces in place.
Looking for more Small Animal Collection Friends?
Turkey, Giraffe, Elephant, Frog, Horse, Unicorn, Bears