Annie Design Crochet Bandana Head Scarf Free Pattern
Annie Design Crochet Bandana Head Scarf Free Pattern
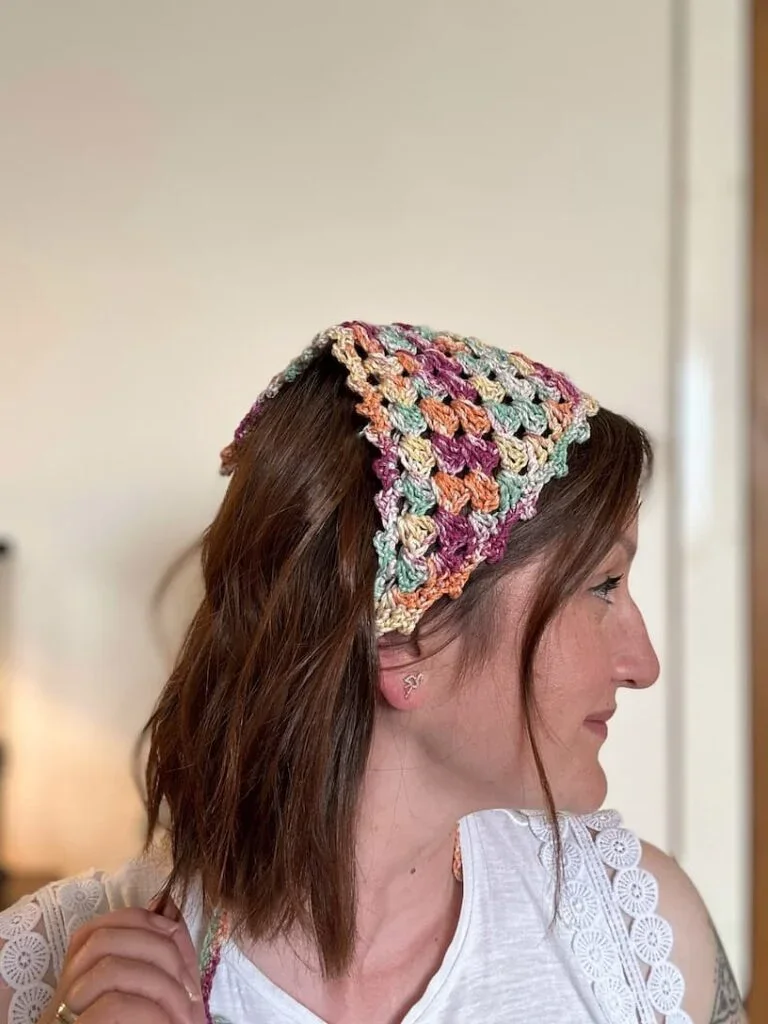
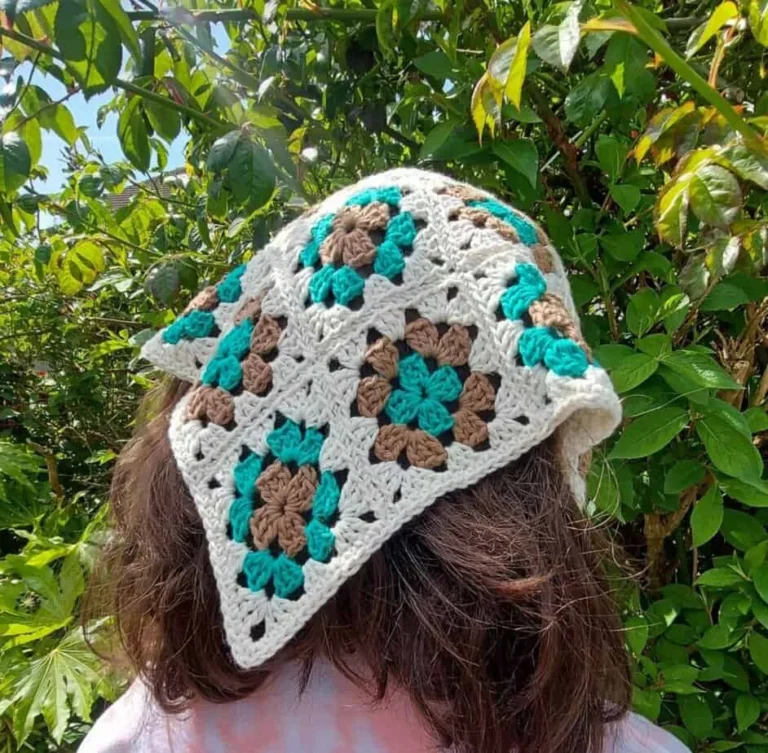
If you’re on the hunt for the perfect stash-busting project with serious style, look no further than this vibrant Crochet Bandana Head Scarf from Annie Design Crochet! Combining the classic look of granny squares with a charming patchwork design, this bandana is the ultimate boho accessory for summer days. Whether you’re dressing up a casual outfit or need a cute way to keep your hair back, this colorful scarf is both practical and eye-catching.
This free crochet pattern is fantastic for using up small scraps of yarn, letting you create a truly unique, multi-colored piece. The design features small, easy-to-make granny squares and triangles that are joined together to form the head scarf, making it a great portable project. Finished off with a neat border and secure ties, it’s a fun and rewarding make for crocheters of all skill levels. Grab your hook and dive into your yarn stash to start this beautiful, nostalgic project!
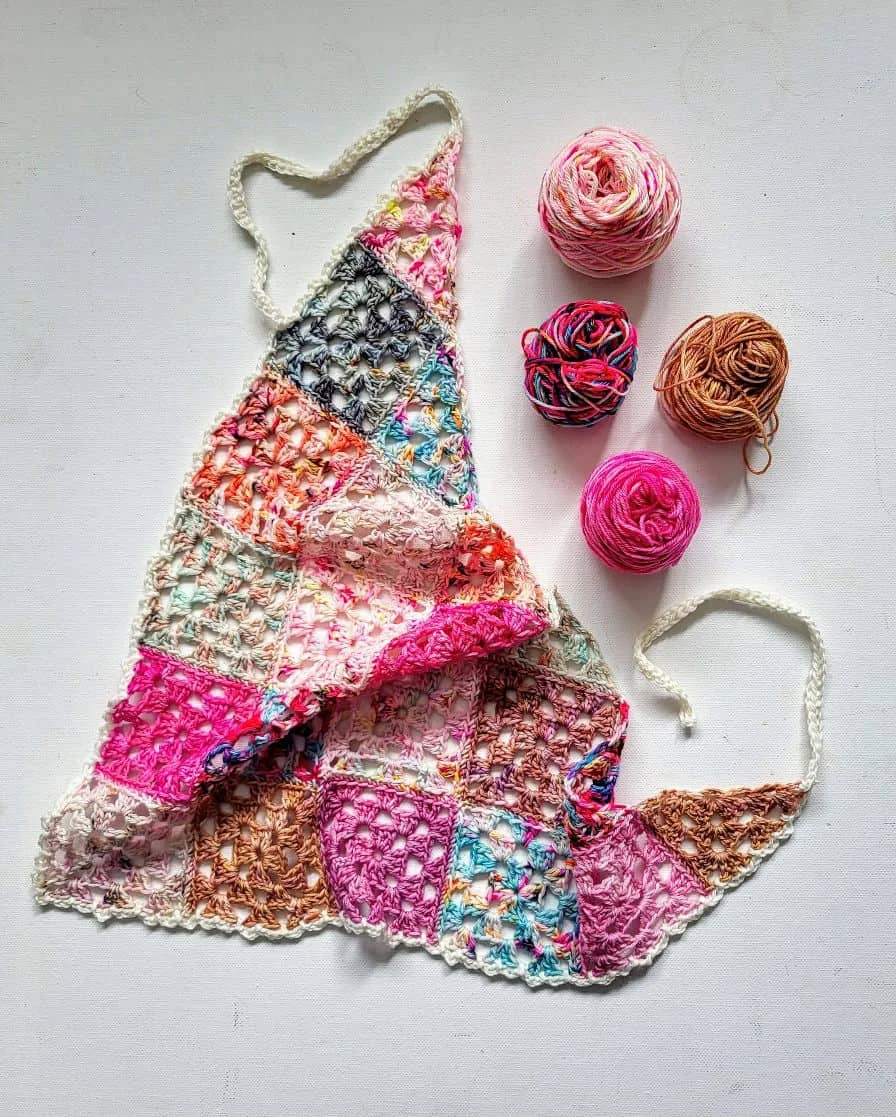
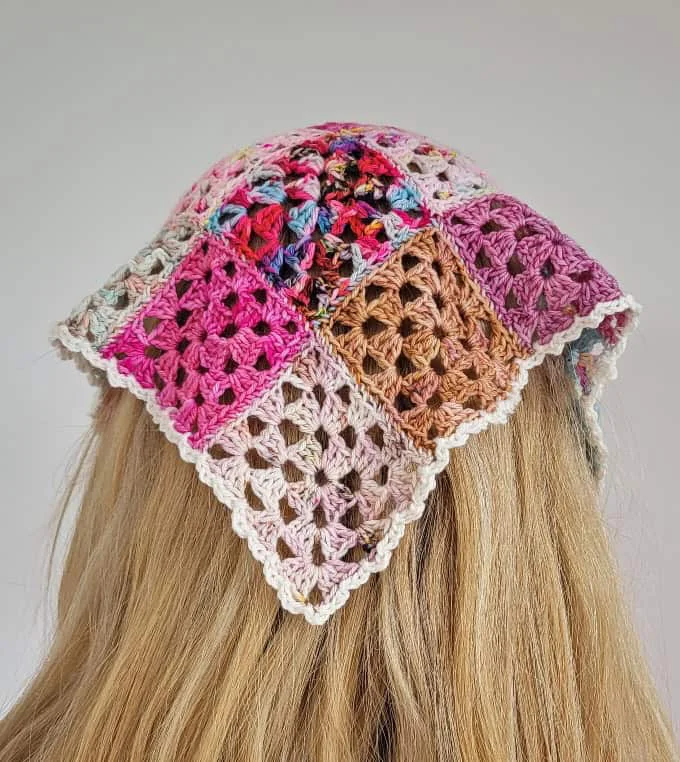
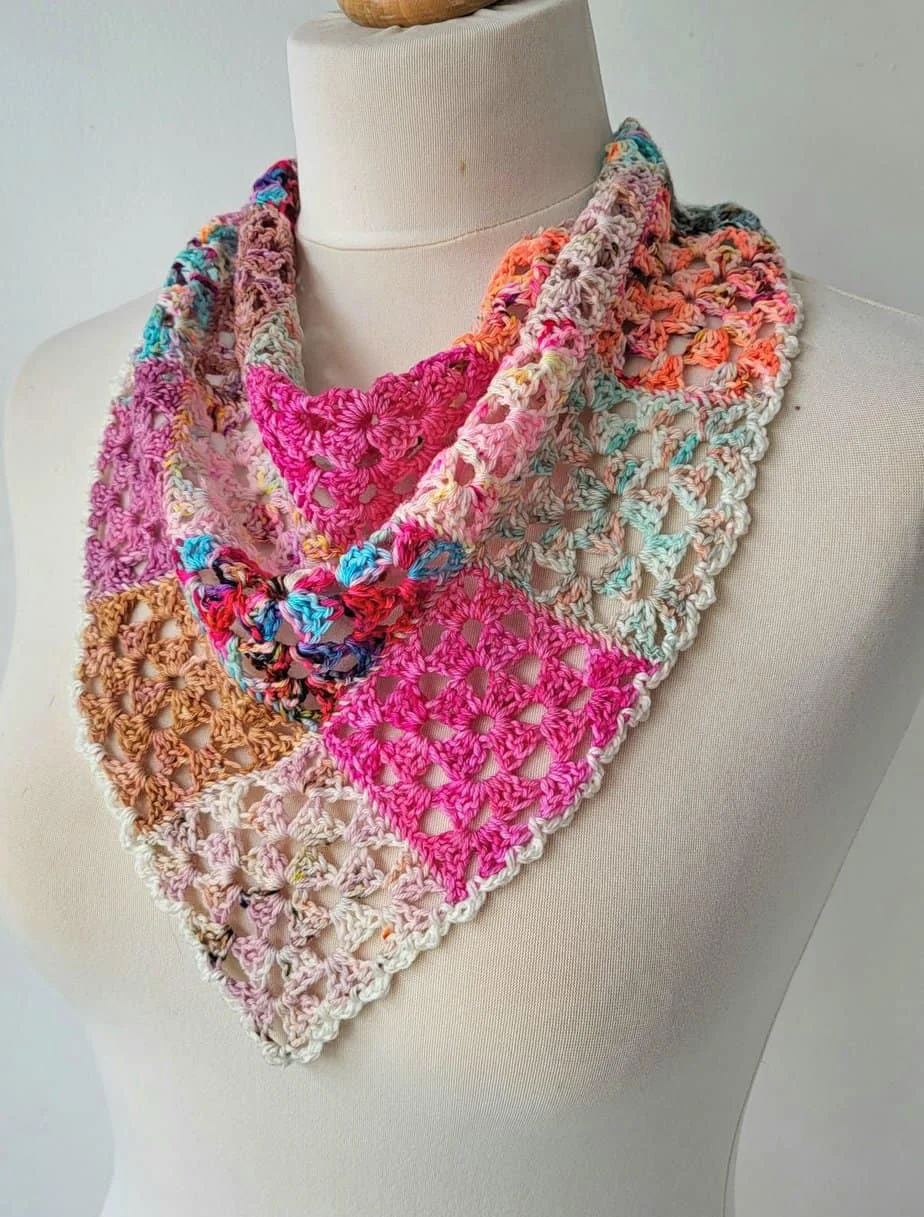
Materials for Crochet Bandana Pattern
Any scraps of fingering weight yarn and a 3.5mm hook will work great for this pattern. I used some leftovers from mini skeins with a wool fiber content, but you could use cotton or acrylic yarn—whatever you have on hand.
Since this cute bandana scarf pattern uses only small amounts of yarn, you can have fun choosing different colors from your stash to create a boho-chic vibe! I also used a small amount of neutral yarn for the lacy border and ties.
For a crochet head kerchief in this size, you will need:
- 15 granny squares
- 6 granny triangles (or half granny squares)
I made this bandana slightly larger than the standard size, as I wanted it to roomy enough to cover your head or use as a striking neck scarf. You could use a 3mm hook to make a smaller version if you wish.
Play around with mini skeins and leftovers until you find a combination you love. You can stick to a color scheme or go completely random. Using just one color would also look fantastic.
Have fun creating your own unique patchwork masterpiece!
Patchwork Crochet Bandana Head Scarf Pattern
Adfree printable PDF pattern with 6 pages including all details. Thank you for your support!
Purchase on Ravelry and on Etsy

Skill Level
Only basic stitches are used in this pattern. You need to be familiar with making a granny square.
Materials
- Small amounts of fingering weight yarn in various colors
- Small amount of a neutral yarn for the border and ties
- 3.5 mm [E-4] crochet hook
- Yarn needle for sewing and weaving in threads
You can use approx. 40g of any fingering weight yarn.
Measurements
Head scarf pictured measures 26in [66cm] wide and 12in [30cm] deep after light blocking. The ties are 10in [25cm] long.
- Each square is 2.75in [7cm] approx.
- Each triangle is 4in x 2.75in [10cm x 7cm] approx. Gauge is not important.
Abbreviations
US Crochet Terms
- Beg beginning
- Ch chain
- St stitch
- Sl st slip stitch
- Dc double crochet
- Yo yarn over
- Sp space
- RS right side
Notes
- Pattern is written in US crochet terms
- Ch 3 at beginning of a round counts as 1 dc
- Ch 4 at beginning of a row counts as 1 dc and ch-1
- Includes written instructions.
- The head scarf is made up of 15 squares and 6 triangles sewn together following assembly layout picture on page 4, and then a border and ties are added.
- 3 dc = granny cluster
Color Notes
Gather your scraps of fingering weight yarn. Play around with mini skeins and leftovers until you find a combination you love.
You can stick to a color scheme or go completely random. Using just one color would also look fantastic.

Granny Square (make 15)
(Do not turn your square after each round)
Ch 5 and sl st to 1st ch to form a ring
Round 1 (RS): Ch 3 (counts as 1 dc here and throughout at beg of a round), 2 dc in ring, [ch 3, 3 dc in ring] 3 times, ch 3, join with a sl st in 3rd ch of beg ch 3. Sl st into the next 2 dc and the next ch-3 sp.
Round 2: Ch 3, (2 dc, ch 3, 3 dc) in same ch-sp, [ch 1, (3 dc, ch 3, 3 dc) in next ch-3 sp] 3 times, ch 1, join with a sl st in 3rd ch of beg ch 3. Sl st into the next 2 dc and the next ch-3 sp.
Round 3: Ch 3, (2 dc, ch 3, 3 dc) in same ch-sp, [ch 1, 3 dc in next ch-1 sp, ch 1, (3 dc, ch 3, 3 dc) in next ch-3 sp] 3 times, ch 1, 3 dc in next ch-1 sp, ch 1, join with a sl st in 3rd ch of beg ch 3. Fasten off yarn.
Triangle (make 6)
(There is no RS for triangles; both sides are the same)
With first color, ch 5 and sl st to 1st ch to form a ring
Row 1: Ch 4 (counts as 1 dc and ch-1 sp here and throughout at beg of a row), [3 dc, ch 3, 3 dc, ch 1, 1 dc] in ring, turn.
Row 2: Ch 4, 3 dc in 1st ch-1 sp, ch 1, (3 dc, ch 3, 3 dc) in corner ch-3 sp, ch 1, (3 dc, ch 1, 1 dc) in last ch-1 sp, turn.
Row 3: Ch 4, 3 dc in 1st ch-1 sp, ch 1, 3 dc in next ch-1 sp, ch 1, (3 dc, ch 3, 3 dc) in corner ch-3 sp, ch 1, 3 dc in next ch-1 sp, ch 1, (3 dc, ch 1, 1 dc) in last ch-1 sp. Fasten off yarn.
Assembly
Layout your squares and triangles following placement in picture below. Join by attaching first in rows, and then attach each row together.
Holding RS of motifs together, you will join your motifs in the back loop only by sewing (whip stitching) together. You can use a crochet slip stitch or single crochet joining method if you prefer.
Try to keep your stitches loose to avoid the piece puckering and join your motifs as evenly as you can.

Blocking will sort out any kinks so don’t worry if it looks a bit messy! Pin out your finished piece and steam block lightly.

Border and Ties
With RS facing, join yarn with a sl st in top right corner ch-4 sp of triangle.
- Ch 50, 1 sc in 2nd ch from hook and in each ch across – 49 sc
- Make a sl st back into corner sp – 1st tie made

Side 1
- *[ch 3, sl st into middle dc of next granny cluster, ch 3, sl st into next ch-1 sp] 3 times, ch 3, skip join between squares, sl st into next ch-sp; repeat from * across to next corner space (bottom peak of scarf)
- Ch 3, sl st back into same space (see pictures below)


Side 2
- *[ch 3, sl st into middle dc of next granny cluster, ch 3, sl st into next ch-1 sp] 3 times, ch 3, skip join between squares, sl st into next ch-sp; repeat from * across to next corner space (top left corner ch-4 sp of triangle)
- Ch 50, 1 sc in 2nd ch from hook and in each ch across – 49 sc
- Make a sl st back into corner sp – 2nd tie made
You may like to add more chains to make your ties longer. Fasten off yarn.
Weave in all ends. Enjoy your beautiful patchwork bandana!

Don’t forget to follow me on Instagram and be sure to tag me in your photos so I can see it too, @anniedesigncrochet or #anniedesigncrochet – I can’t wait to see what colours you use with this pattern!
The photographs and pattern contained on this page are the property of Annie Design Crochet.com.
You are welcome to use this pattern to make items to sell, and I would appreciate that you include a link to the free pattern with credit for the designer, thank you!
No unauthorized reproduction, in whole or in part, or distribution of this pattern or content is permitted.